Baked Cod with Basil Chive Yogurt Sauce


Cod with Basil Chive Yogurt Sauce

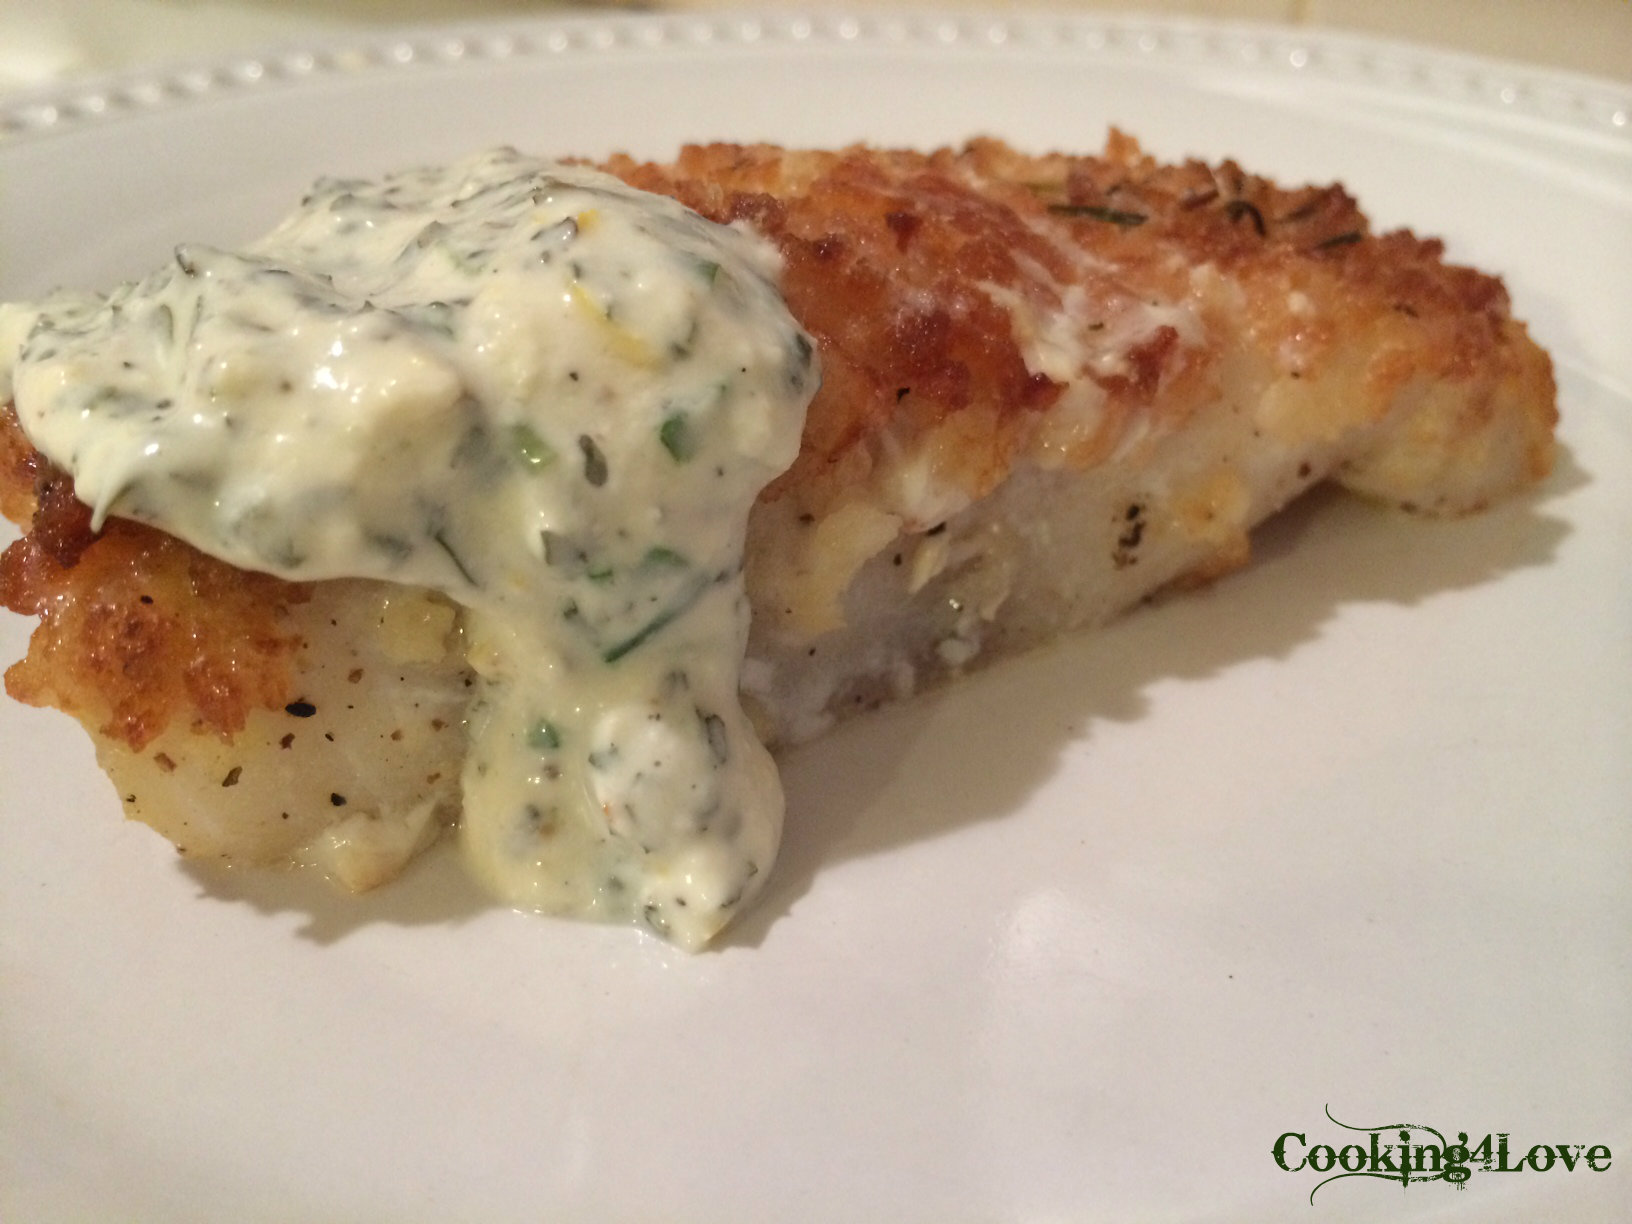
Last weekend, I stopped at my neighborhood Smart & Final for just a few things, and decided to pick up some frozen Cod. I typically prefer my fish to be fresh, but when in a pinch (or I’m being lazy), I’ll grab some frozen. I wanted something light, but flavorful so perused a bunch of recipes for both fish and different types of sauces. I like this Cod dish as it has some crunch on the top while remaining healthy since it’s seared quickly then baked. As for the yogurt sauce, I find it be a nice complement to the fish in terms of flavor points and adding some additional protein. I suggest making the sauce first (directions further down) so it’s ready when the fish is done.

Ingredients 

  • 2 (6-ounce) cod fillets
  • Panko bread crumbs
  • 1 egg, for egg wash
  • Kosher salt and freshly cracked black pepper
  • 2 tbsp. grapeseed oil
  • 1/4 lemon, juiced
  • 1 tbsp. butter
  • 1 sprig fresh thyme (or 1/8 tsp. dried thyme)

Directions

  1. Preheat oven to 400° F. Place the fillets on a sheet tray or rack so the fish can release its natural juices.
  2. Place the bread crumbs into a shallow dish.
  3. In a separate shallow dish, add 1 beaten egg. Season both sides of the fillet with salt and pepper. Once seasoned, brush the belly side of the cod with the egg. Dip the egg side into the panko bread crumbs.
  4. In a cast iron skillet, add grapeseed oil. Before placing fish into pan, make sure the skillet is very hot. Sear only 1 side of the fish (the side with the bread crumbs). Once the 1 side is seared, place the skillet in the oven for about 4-6 minutes until cooked. *If you don’t have a cast iron skillet, use a regular skillet, then transfer to a greased baking dish, and increase the time to about 10-12 minutes.
  5. Once the fish is cooked, flip it over and add the lemon juice, butter and sprig of thyme. Let melt and baste the fish with the juice.
  6. Remove from pan, place onto plate and top with sauce.

Chive Basil Yogurt Sauce

Ingredients

  • 1/8-1/4 tsp. garlic powder, depending on your garlic preference
  • A pinch of kosher salt
  • 1 tsp. Dijon mustard
  • The finely grated zest and juice of a 1/2 small lemon
  • 4 tsp. of dried parsley
  • A small fistful (about 3 tbsp.) of fresh basil, stems removed, chopped
  • A thumb-thick bundle of fresh chives, chopped (or approx. 1 tbsp. dried)
  • 1/2 cup thick natural yogurt; use full-fat Greek yogurt if calories aren’t an issue
  • 1 tbsp. good-quality light mayonnaise, such as Hellman’s (optional)
  • Salt and milled black pepper

Directions

  1. Stir mustard, garlic, salt, lemon zest and lemon juice in a small mixing bowl, mix/mush well.
  2. Add parsley, then very finely chop the basil and chives, and add them to the bowl.
  3. Stir in the yogurt and mayonnaise (if using), and season to taste with salt and black pepper.

Seared & Baked Cod

Top ↑

Advertisement

Spaghetti Squash Marinara


Spaghetti Squash Marinara

Lately, I’ve been seeing a lot of recipes being shared on Facebook, most of which are healthy and look really delicious. I try to make a point of “liking” or sharing the post so I can go back to it, or I simply copy it down. Last week, one of my friends shared one for spaghetti squash, and sadly, I didn’t do either and don’t recall which friend it was. I figured I could wing it, but looked up a few recipes to find out about cooking times in both the oven and microwave. I ended up cooking mine in the oven, mostly because my microwave is small and cooking a whole spaghetti squash in there can lead to spaghetti squash wallpaper if it explodes. Needless to say, the end result was incredible, and honestly, tasted better than I expected. If you like healthy, and/or love pasta, but hate the carbs, look no further!  If you’re short on time or just want to simplify this recipe , you can use your favorite spaghetti or marinara sauce instead of making this one, but I recommend you trying mine out 🙂 I added lean ground Italian turkey to mine; however, if you’re a vegetarian or vegan, obviously you can omit it. Feel free to add some veggies, too, if you so desire.

*UPDATE* –  shortly after posting this, I stumbled across a spaghetti squash recipe that looked amazing, so I quickly took the remaining half squash from this recipe and added the two additional ingredients, which I’ll post at the bottom (with a photo, of course)!

Ingredients

  • 1 medium uncooked spaghetti squash, about 2 lbs.
  • 1 (14.5 oz.) can stewed tomatoes, chopped
  • 1 (14.5 oz.) can whole Roma tomatoes, chopped (discard juice)
  • 1/2 lb. lean ground Italian turkey meat (I used Jennie O), optional
  • 1 tbsp. extra virgin olive oil plus extra for baking dish
  • 1 cup onion, finely chopped
  • 1-2 tsp. garlic, minced
  • 1 tsp. fennel seeds, ground in spice mill or using mortar & pestle
  • 1 tsp. Italian seasoning
  • 2 tbsp. fresh basil, chopped
  • Salt and pepper, to taste and for sprinkling baking dish
  • Parmesan cheese, go big and just use a little for the top

Cooked Squash

Directions

  1. Preheat oven to 375°F.
  2. Cut squash in half lengthwise using a sharp knife. This can be somewhat difficult, so be careful. If need be, start at one end, cutting half way through then turn it around and cut through the other half. Once the squash is cut in half, scoop out the seeds.
  3. Drizzle a little olive oil in a large baking dish, then sprinkle with some salt & pepper. Place squash cut sides down in dish and prick skin with a fork all over.
  4. Cook for 45 minutes.
  5. While the squash is cooking,  heat oil in a medium skillet over medium heat. Add onion, garlic and crushed fennel, and sauté until tender, about 5 minutes.
  6. Add ground turkey, and continue to sauté until cooked through, breaking into small pieces, about 10 minutes.
  7. Stir in tomatoes (including juice from the can of stewed tomatoes), basil and Italian seasoning; bring to a boil. Reduce heat and simmer, uncovered, stirring often, 5 minutes or until desired consistency.
  8. Remove squash from oven and carefully turn over with an oven mit (they’ll be hot!). Rake the stringy squash pulp from the skin with a fork, separating it into strands that look like spaghetti. You can either serve the squash in its skin or move the strands to a plate.
  9. Spoon sauce over squash and sprinkle with Parmesan cheese.

Yummy!

Additional Recipe: Cheesy Spaghetti Squash with Marinara

Cheesy Spaghetti Squash

The additional items you’ll need are 1 cup of cottage cheese (I prefer low fat) and 1 cup of shredded cheese. I used a light Mexican four-blend, but the recipe I saw calls for Mozzarella. To make this, after cooking the squash and scraping the strings with a fork, add 1/2 cup cottage cheese to each half, top with marinara, and then add 1/2 cup cheese to each one. Put on a baking sheet and place under the broiler for approximately 3-5 minutes. I added some fresh chopped oregano and basil, and as you can see, some of it burned, so I ended up finishing it in the microwave until the cheese got melted and bubbly.

Top ↑

Mexican Egg White Omelet With Goat Cheese


Mexican Egg White Omelet

I whipped up this little omelet this morning, and wasn’t going to post it, then thought, why not share the deliciousness?!! Obviously, you can add (or omit) whatever veggies and/or spices that suit your fancy, but I love the combination of what I put into mine today. If you’re not a fan of goat cheese, just substitute your favorite.

Ingredients

  • 1/2 cup egg whites, from 4 large eggs or liquid whites
  • 2 pearl onions, chopped
  • 1 tbsp. jalapeño peppers, sliced or diced
  • 1 tbsp. goat cheese
  • 3-4 cherry or plum tomatoes, sliced
  • 1/2 avocado, chopped
  • 1/2 tbsp. cilantro, more or less to taste
  • 1/8 tsp. Mexican chili powder
  • 1/8 tsp. garlic powder
  • Salt and pepper, to taste
  • 2 tbsp. extra virgin olive oil

Omelet Ingredients

Omelet Cooking

Directions

  1. Heat 1 tbsp. oil in a small skillet over medium heat.
  2. Add chopped onions to pan and sauté for approximately 3 minutes, or until softened.
  3. Remove from skillet & set aside.
  4. Wipe down pan and add remaining oil back to skillet.
  5. Put egg whites and spices in a small bowl and whisk with a fork until slightly frothy.
  6. Pour mixture into heated pan, swirl around a little and let cook for about 5 minutes, until almost completely set and opaque.
  7. Add remaining ingredients, including the sautéed onions, to one side of the omelet, then sprinkle with goat cheese.
  8. Fold “empty” side of omelet over the other side and carefully slide out of pan onto a serving plate.
  9. Garnish with cilantro and serve with additional avocado slices and salsa, if desired.

Egg White Omelet

Egg White Omelet

Top ↑

Avocado and Mango Salad


Prior to dressing & cilantro

I recently had dinner at my neighborhood sushi restaurant, and remembered the last time I ate there was when my best friend was visiting over Memorial Day weekend. We ordered their mango and avocado salad, which was seriously amazing. I didn’t order it this time (sigh), but kept thinking about it after I got home, and decided to make a similar version after a trip to Trader Joe’s the following day. There is so much flavor in this quick fruit salad, not to mention, it’s extremely healthy. Two days later, I’m still enjoying it!!!

Ingredients

  • 1 tbsp. balsamic vinegar
  • 1 tbsp. lime juice
  • 2 tbsp. extra-virgin olive oil
  • Salt & freshly ground black pepper
  • 2 mangos, cubed
  • 2 avocados, cubed
  • 8-10 plum or cherry tomatoes, cut in half
  • 2 tbsp. fresh cilantro, minced

Directions

  1. In a large serving bowl, whisk together vinegar, lime juice, salt and pepper to taste. Slowly whisk in oil.
  2. Toss in mangoes, avocado and tomatoes to coat.
  3. Garnish with cilantro and serve immediately.

Mango & Avocado Salad

Top ↑

Cauliflower Crust Pizza


Cauliflower Crust Pizza

Recently, my Mom and cousin shared a recipe on Facebook for a no carb pizza crust, containing cream cheese, eggs and a few other ingredients, which my Mom decided to try. She said it was very good, but didn’t get crispy. I was thinking about it today, but being a thin, crispy crust lover, I figured it wouldn’t suit me. The wheels started turning, as did my search for a no-carb/low-carb crust alternative. I came across a few using cauliflower, which received fabulous reviews so decided I would give it a shot, making my own adjustments. Well, let me tell you that I was floored with how good this crust is. Seriously. Delicious! While it’s not zero carbs, it does only contain 15 carbs (9 net carbs) for the whole crust!!! And as my friend, Johnathan says, “Definitely a healthy alternative. And is a good source of fiber, vitamin C, potassium and folate.” I should add the crust is gluten-free, and after doing the math, one slice of my pepperoni pizza (10 inch pie cut into six pieces) is a mere 133 calories! However, I sliced mine thinner into eight pieces, so just 100 calories per slice.

The original recipe calls for cooking it at 450°F for 15 minutes, but that resulted in very crispy edges. Mind you, I have an antique stove, so my cooking times need to be to be watched (except in the case of today when I was doing other things). That said, I recommend using a lower temp and keeping an eye on the crust so it doesn’t burn.

Update 6/22/13: I made this again last night & changed a few things due to what I had on hand… substituted liquid egg whites for the egg, used a part-skim Mexican cheese blend instead of mozzarella, and added a teaspoon of dried basil and 1/2 teaspoon of dried parsley to the recipe below. For my first pizza, I finished cooking it (with the toppings) under a broiler, but last night, just turned up the oven and finished it off in there. I prefer that method, so changed the directions below to reflect that. I’ve included a few more pictures so you can see the difference in the two pizzas. Both versions are amazing – it’s really just a matter of personal preference. Obviously, using egg whites reduces the calories so if that’s a concern, I’d recommend going that route.

Ingredients (Crust)

  • 1/2 medium-large head cauliflower (or 2+ cups shredded cauliflower)
  • 1 large egg (or 2 egg whites = 1/4 cup liquid egg whites)
  • 1 cup part-skim shredded Mozzarella cheese (or Mexican cheese blend)
  • 2 tbsp. grated Parmesan cheese
  • 1 teaspoon dried oregano (feel free to add some dried basil, parsley, etc.)
  • 1/2 teaspoon garlic powder
  • 1/2 teaspoon onion powder
  • 1/4 tsp. Kosher salt
  • 1/4 tsp. ground black pepper

Grating Cauliflower

Crust Ingredients

The Crust - Pre-Baked

The second crust using a Mexican cheese blend and the addition of dried basil and parsley.
The second crust made w/liquid egg whites, a Mexican cheese blend & the addition of dried basil and parsley.

Baked Crust

The second cooked crust with Mex cheese blend.
The second cooked crust.

Ingredients (Pizza)

  • 1/2-1 cup pizza sauce
  • 1/2 cup Mozzarella cheese
  • Toppings of your choice (I used pepperoni and goat cheese)

Sauce, Cheese and Toppings Added

Directions

  1. Preheat oven to 375°F.
  2. Spray a cookie sheet or pizza pan with nonstick cooking spray.
  3. Grate the cauliflower in a large bowl using a box/cheese grater until you have 2 cups of cauliflower crumbles.
  4. Place bowl in microwave and cook for 7-8 minutes, or until softened (no water). Remove and let cool.
  5. Mix in the egg, Mozzarella, Parmesan, oregano, garlic & onion powders, salt and pepper, stir well.
  6. Once combined, pat into a 10-inch round on the prepared pan. Spray lightly with non-stick spray and bake for 15 minutes, or until golden (make sure to monitor it).
  7. Remove from the oven, turn the oven up to 425°F. *See note below.
  8. Spread pizza sauce over crust, leaving 1/4 to 1/2 inch border around the edge.
  9. Sprinkle with 1/2 cup Mozzarella cheese (or the cheese of your choice), and add your favorite toppings.
  10. Place back in the oven for approximately 5-10 minutes, or until cheese has melted and toppings are hot. Keep an eye on it to avoid burning.
  11. Slice and serve immediately.

Fresh Out of The Oven

Pizza Slices

Delicious Pizza

Second pizza made with egg whites and Mex cheese.

Note: you can also turn the oven to broil and place under broiler for 3-4 minutes.

Top ↑

Baked Fish Fillets


Baked Cod

Here’s another healthy and delicious recipe for baked fish. You can use any firm white fish; cod, haddock or grouper. I used one large piece of cod, which was perfect for two servings.

Ingredients

  • 1 large piece of Cod
  • 1 tbsp. lime juice
  • 1 tbsp. light mayonnaise
  • 1/4 tsp. onion powder
  • 1/4 tsp. black pepper
  • 1/8 tsp. garlic powder
  • 1/2 tbsp. freshly grated Parmesan cheese
  • 1 tbsp. panko breadcrumbs
  • 1 tbsp. butter
  • Salt
  • Cooking spray

Directions

  1. Preheat oven to 425°F.
  2. Place fish in a 5 x 9-inch baking dish coated with cooking spray and season with salt.
  3. Combine lime juice, mayo, onion powder, pepper and garlic powder in a small bowl, and spread over fish.
  4. Sprinkle with panko breadcrumbs and parmesan; drizzle with butter.
  5. Bake at 425° for 20 minutes or until fish flakes easily when tested with a fork.
  6. Serve with avocado-lime sauce, if desired.

Top ↑


Guiltless Blue Cheese Dip/Dressing


Healthy Blue Cheese Dressing

With summer quickly approaching, I’m doing my best to eat healthier without sacrificing flavor. I’ve been marinating chicken wings (yes, I’m baking them), and decided I wanted a blue cheese dip to accompany them this time, but know that packs a punch with fat and calories, so was on the hunt for a lighter recipe. I found quite a few using non-fat Greek yogurt, and went with the one I wanted to try, making a couple of modifications. I love that this is about half the calories of your traditional blue cheese dressing and the only fat comes from the blue cheese/gorgonzola. Blue cheese lovers rejoice!!!

Ingredients

  • 2 tbsp. gorgonzola or blue cheese crumbles
  • 1/4 cup non-fat Greek yogurt (I used Fage)
  • Juice of 1/4 small lemon
  • 1/2 tbsp. white vinegar
  • 1/2 tsp. Worcestershire
  • 1/8 tsp. salt
  • Black pepper, to taste
  • Pinch garlic powder
  • Pinch onion powder
  • Drizzle of honey or agave

Directions

  1. Combine blue cheese, Greek yogurt, lemon juice, Worcestershire and vinegar in a bowl and mix well.
  2. Add all seasonings and a drizzle of agave or honey and stir well with a fork.
  3. Serve with chicken wings, your favorite salad, veggies, etc.

The thickness of the dressing will vary depending on the brand of Greek yogurt you use. If necessary, add water (one tablespoon at a time) and stir until dressing reaches desired consistency.

Top ↑

Baked Tilapia


More Tilapia! I decided to make this dish last night since I had two remaining vacuumed-sealed frozen filets in the freezer and really didn’t feel like venturing out to the grocery story, and because it’s easy (and quick) to make. It turned out super delicious and just melts in your mouth with a nice buttery flavor, hint of lemon, and little salty tang from the capers.

Baked Tilapia and Green Beans

Ingredients

  • 2 tilapia fillets (6 oz. each)
  • 3 tbsp. butter, melted
  • 3 tbsp. lemon juice
  • 1/8 tsp. kosher salt
  • 1-1/2 tsp. garlic powder
  • 1/2 tsp. onion powder
  • 2 tbsp. capers, drained
  • 1/2 tsp. dried oregano
  • 1/8 tsp. paprika

Directions

  1. Place tilapia in an ungreased 13-in. x 9-in. baking dish.
  2. Season fish with salt, garlic and onion powder.
  3. In a small bowl, combine the butter and lemon juice; pour over the fillets.
  4. Sprinkle with oregano, paprika and capers.
  5. Bake, uncovered, at 425°F for 10-15 minutes or until fish flakes easily with a fork.

Top ↑

Pan-Seared Tilapia with Cilantro, Soy, Ginger and Avocado


I was perusing recipes yesterday that used avocados, as I had four ripe ones ready to eat and knew I didn’t want to make guacamole or add them to a salad, but rather in some kind of main dish. I came across one from Tyler Florence which sounded delicious using sushi-grade tuna, and decided to try it with the tilapia I had on hand. Needless to say, it was fabulous, in addition to being easy to make. Oh, and it’s healthy, too!

Tilapia with Cilantro Sauce and Avocado

Ingredients

  • 2 big handfuls fresh cilantro leaves, finely chopped
  • 1/2 jalapeño, diced
  • 1 tsp. grated fresh ginger
  • 1 garlic clove, grated
  • 2 limes, juiced
  • 2 tbsp. reduced sodium soy sauce
  • Pinch of granulated sugar
  • Sea salt and freshly ground black pepper
  • 3 tbsp. extra-virgin olive oil
  • 2 Tilapia filets, about 3 oz. each
  • 1 ripe avocado, halved, peeled, pitted, and sliced

Directions

  1. In a mixing bowl, combine the cilantro, jalapeño, ginger, garlic, lime juice, soy sauce, sugar, salt, pepper, and 2 tbsp. of olive oil. Stir the ingredients together until well incorporated.
  2. Place a large skillet over medium-high heat and coat with the remaining 1 tbsp. of olive oil.
  3. Add the tilapia to the pan with half of the cilantro mixture and sauté until lightly browned and cooked through, about 10 minutes.
  4. Serve with the sliced avocado and remaining cilantro sauce, drizzled over the fish.
  5. Garnish with cilantro, if desired.

Top ↑

Healthy Fettuccine “Alfredo”


This slideshow requires JavaScript.

I recently saw a post on Facebook from Daphne Oz about her take on Fettuccine Alfredo using a cauliflower puree as the substitute for alfredo sauce. Since I’ve made cauliflower mashed “potatoes” before, and it turned out delicious, I was overly anxious to try her recipe. And as expected, it turned out delicious! Feel free to add some chicken, seafood or tofu if you desire some protein with your pasta. I pretty much followed the recipe to a tee, which is rare, since I usually put my own take on it, but didn’t really see a need for changing anything. This does yield a ginormous amount of pasta, so divide it in half if you’re not feeding a large family or small army 😉

Ingredients

  • 1 pound fettuccine
  • 4 cups cauliflower (cut into large chunks)
  • 1 cup milk
  • 2 tbsp. butter
  • 1 large shallot (finely minced)
  • 1/2 cup white wine
  • 1/4 cup Parmigiano-Reggiano (freshly grated)
  • 1/4 tsp. ground nutmeg
  • 1/3 cup Parsley (chopped)
  • 1 tbsp. olive oil
  • Salt and pepper

Directions

  1. Place the milk and the cauliflower in a large sauce pot and season with salt and pepper.
  2. Bring up to a boil and reduce to a simmer, cover and cook until fork tender, about 8 to 10 minutes.
  3. Using a slotted utensil, transfer the cauliflower to a blender.
  4. Add the milk to make a creamy puree.
  5. Add the butter and continue blending until smooth. Taste and adjust seasoning.
  6. Bring a large pot of water to a boil and season generously with salt (Daphne writes, “so it tastes like the ocean”).
  7. Cook the pasta one minute less than the packaged instructions.
  8. While the pasta is cooking, place a large sauté pan over medium heat and add 1 tbsp. of olive oil. Add the shallot, season with salt and cook for 2 to 3 minutes, or until slightly tender.
  9. Deglaze with the white wine. Reduce by half, about 1 to 2 minutes.
  10. Add the cauliflower puree to the sauté pan and thin out with about 1/3 cup of pasta water.
  11. Remove the pasta from the water, add it to the cauliflower puree, and then sprinkle ground nutmeg over the top.
  12. Toss again and add more cooking water if the pasta seems too dry.
  13. Add the Parmigiano and parsley, and toss to coat.

Note: For leftovers, you can reheat in the microwave or on top of the stove, but may want to add a little milk or water to make it saucier after being refrigerated.

Top ↑