Banana Blueberry Muffins


Hello from sunny South Florida! My journey has brought me back to the sunshine state, working for an incredible organization, JM Family Enterprises (Southeast Toyota Finance) and living close to family and friends again. Life is good!

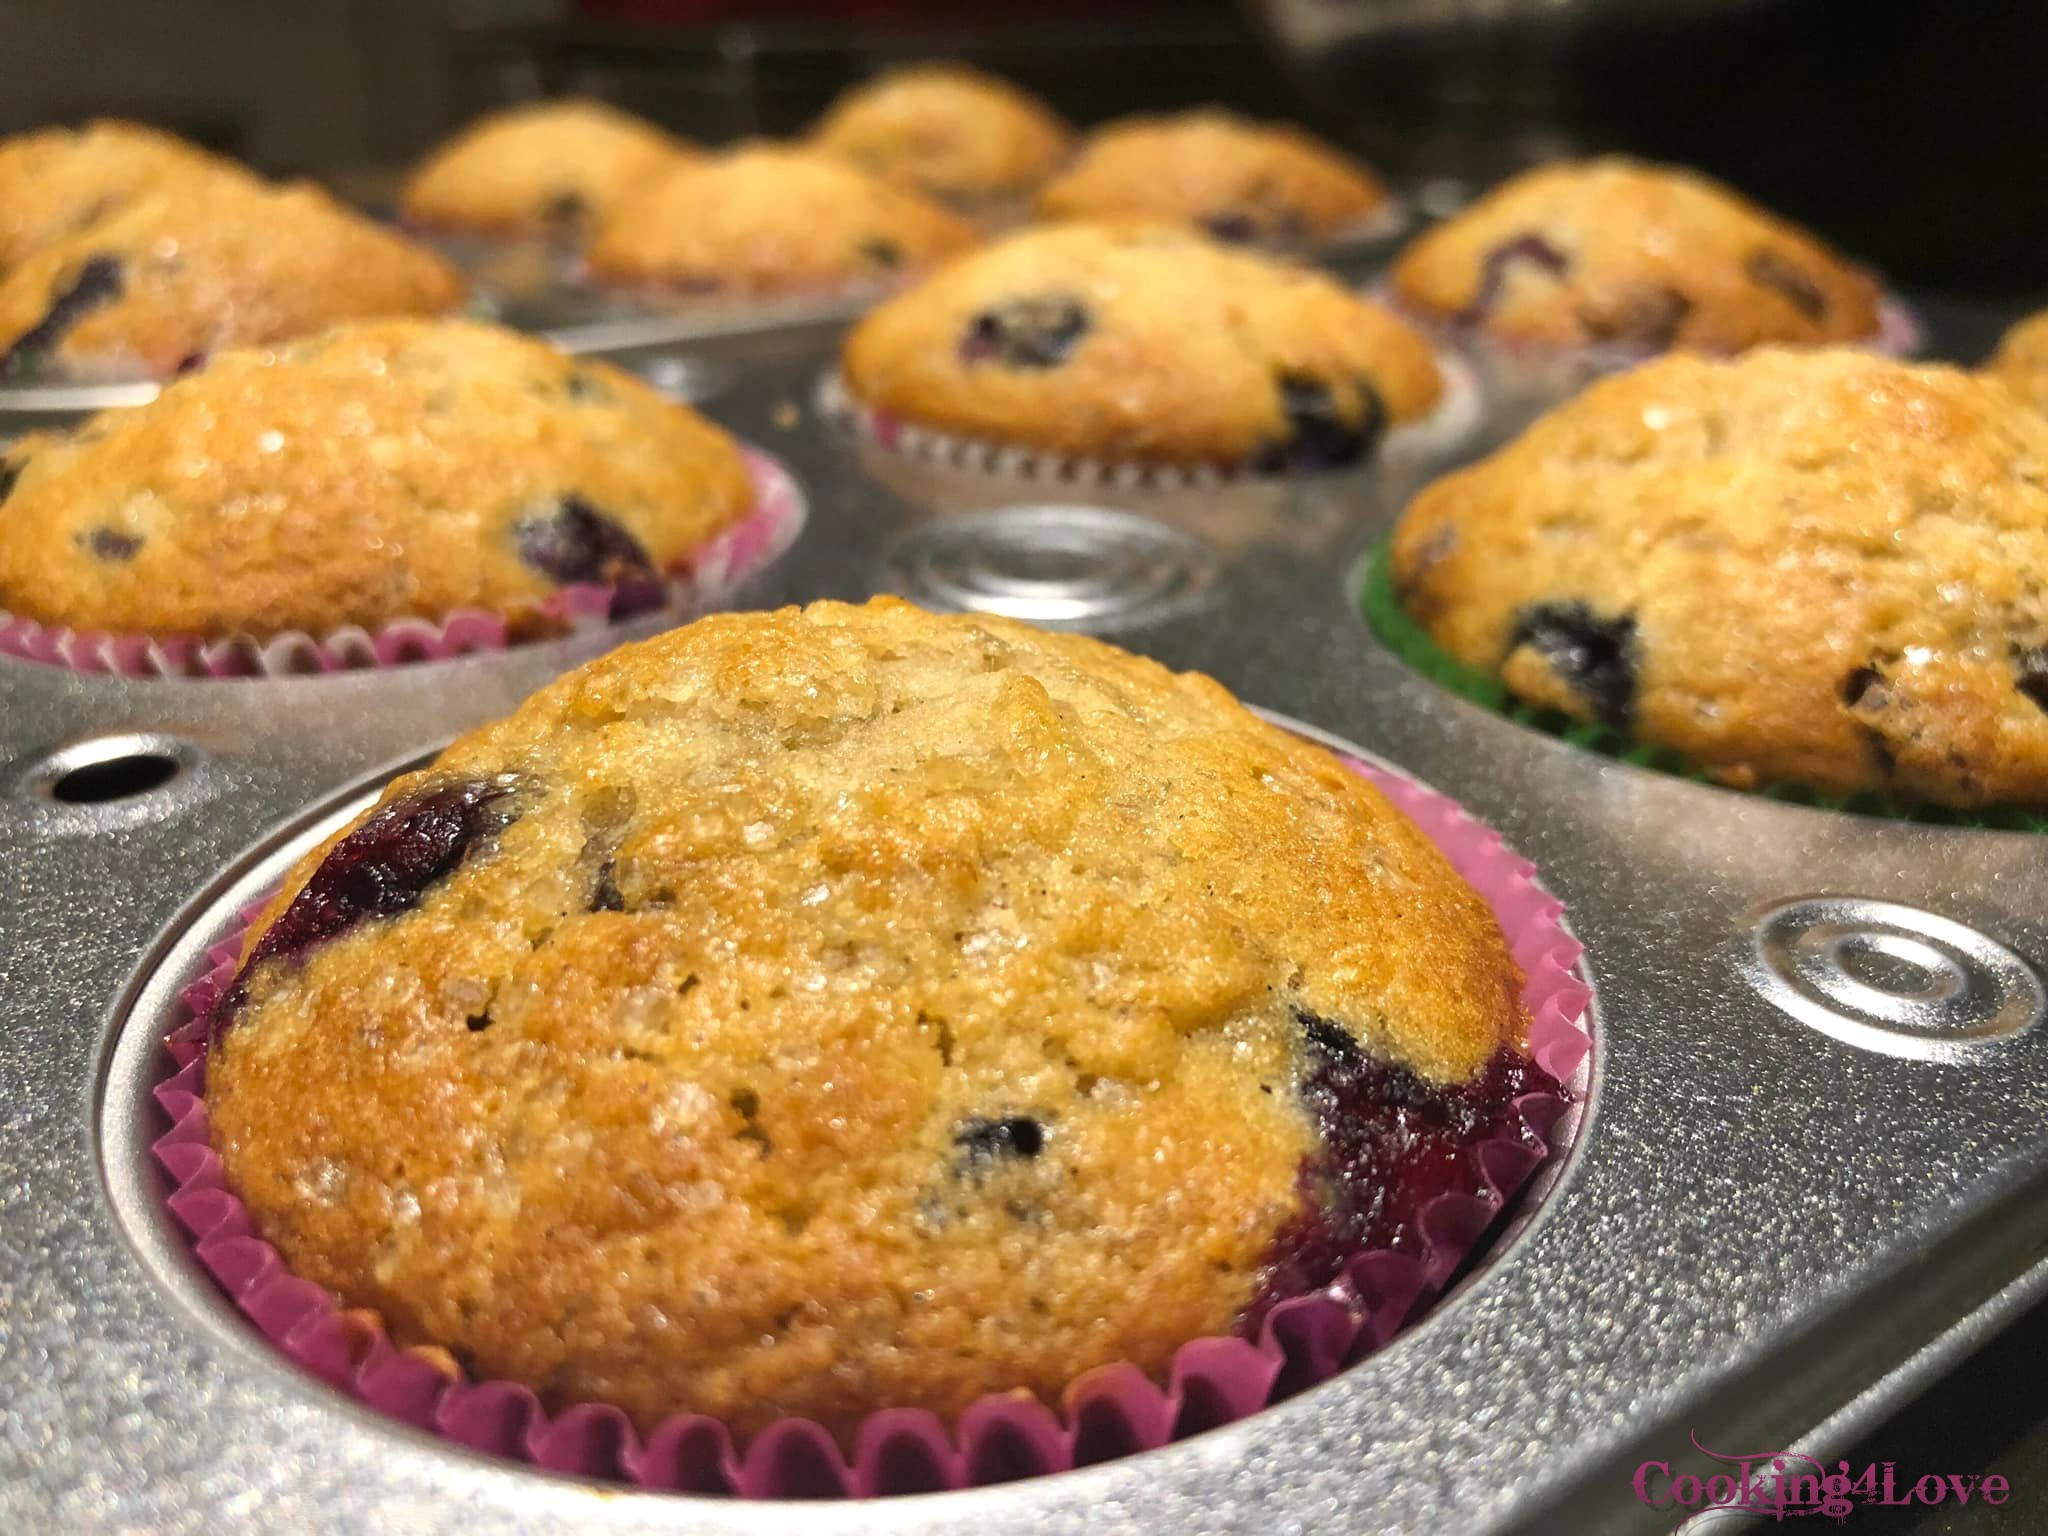
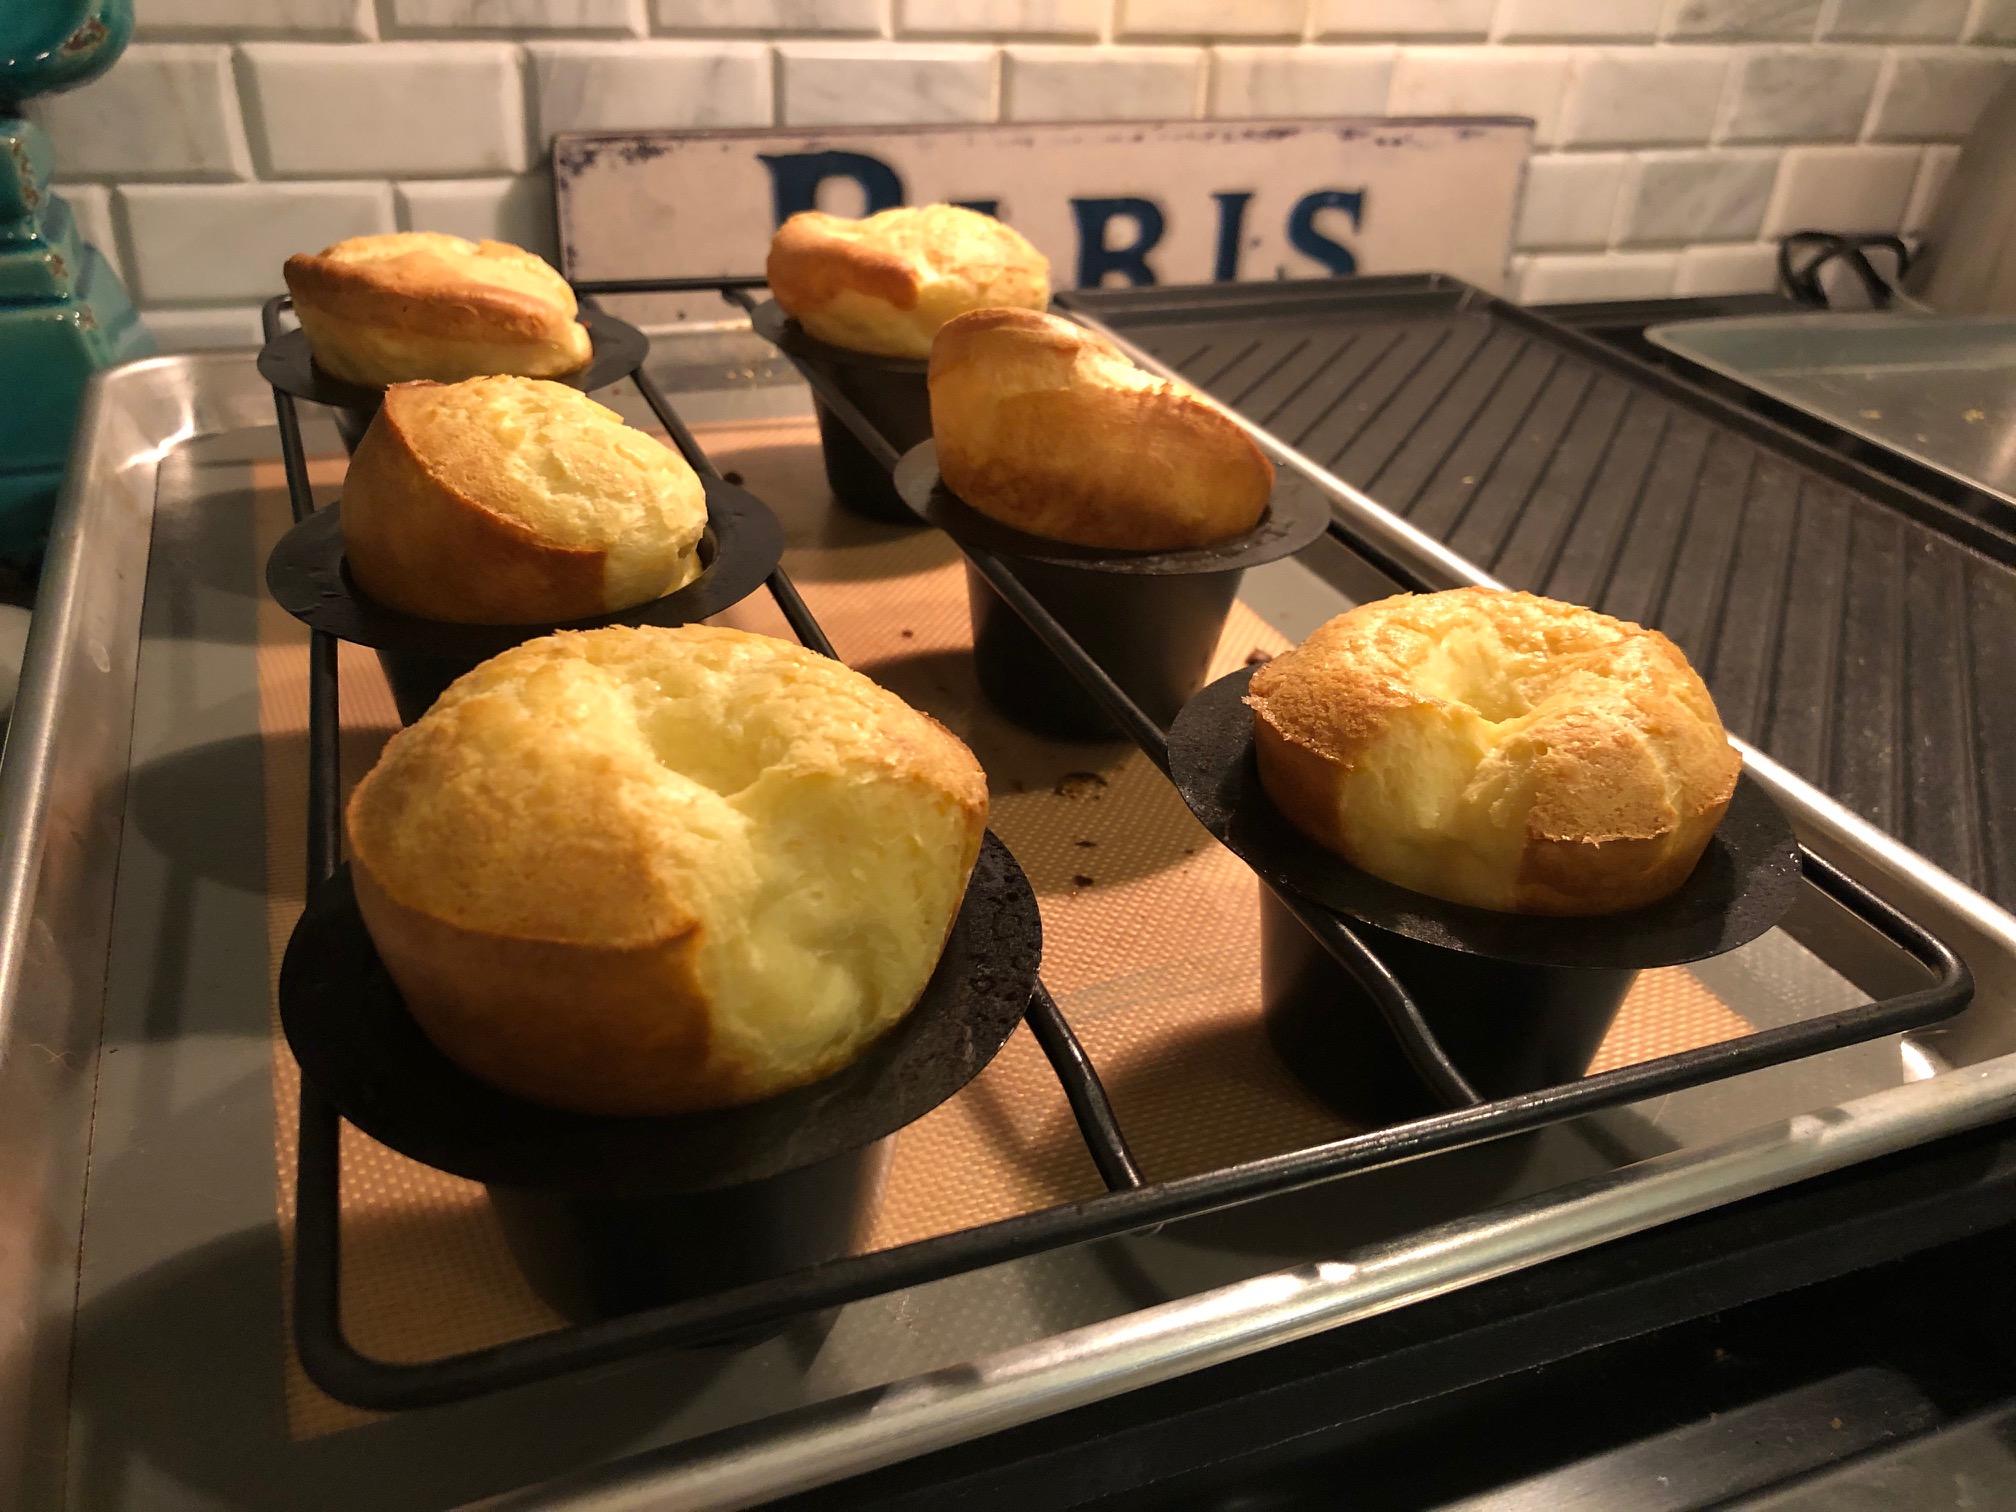
I stumbled upon this recipe months ago and as I normally do, altered it a bit, and have since, made these muffins four times now. They are delicious! My first time making them, I used Paleo flour and was short a banana, so added applesauce for additional moisture, and you would never know the difference in the flour. I now add applesauce every time I make them, which is included below. The last couple times, I added chocolate chips, simply because I love chocolate and find it’s a nice addition to the fruit, but you can certainly leave them out.

Recipe adapted from Spend With Pennies.

Ingredients

  • 1 ½ cups fresh blueberries
  • 1 tbsp. flour to toss with blueberries
  • 1 ½ cups flour (for non-grain, I recommend Bob Mills Paleo https://amzn.to/3zhssFt)
  • 1 tsp. baking powder
  • 1 tsp. baking soda
  • ¼ tsp. salt
  • 1 cup bananas, mashed (about 2 or 3, depending on size)
  • 8 tbsp. (4 oz.) applesauce (I prefer Mott’s cinnamon applesauce https://amzn.to/3Orvbkc)
  • ½ cup sugar
  • ½ cup butter, melted
  • 1 egg, beaten
  • 1 tsp. vanilla extract or paste (my favorite/only kind I use, Nielsen-Massey https://amzn.to/3ocVAr1)
  • Sugar in the raw, sprinkled (optional)
  • 1 cup chocolate chips (optional)

Directions

  1. Preheat oven to 375°F. Line a muffin pan with paper liners.
  2. Toss blueberries with 1 tablespoon of flour, set aside.
  3. Whisk dry ingredients in a medium bowl – flour, baking powder, baking soda, salt.
  4. In a separate bowl, combine bananas, applesauce, sugar, melted butter, egg, and vanilla. Add to dry ingredients and mix until just combined. (don’t overmix)
  5. Gently fold in blueberries (and chocolate chips, if using)
  6. Divide batter evenly over muffin wells (I used two muffin tins with 6 muffin wells each).
  7. Sprinkle raw sugar on top of each muffin/batter (optional).
  8. Bake 18-20 minutes until golden brown or until a toothpick comes out clean. Cool completely.

Muffins can be stored in an airtight container on the counter or in the fridge for 4 to 5 days.

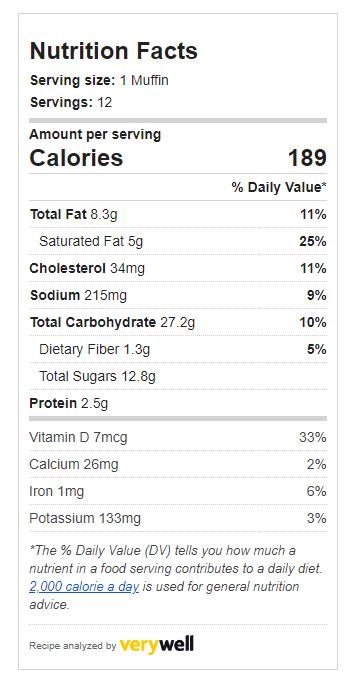
The nutritional information below does not include the 1 cup of chocolate chips. If added, the additional calories are 74, totaling 263 per serving.

Advertisement

Key Lime Pie Martini


While perusing recipes over the weekend, I somehow stumbled upon this insanely delicious concoction. I found there are many variations, some using pineapple juice, sweet and sour mix, coconut rum, and so on. I took two recipes I found, swapped out a couple of ingredients and thought it tasted exactly like the dessert version. A slice of heaven in a glass.

Ingredients

  • 3 tbsp. Licor 43
  • 1 tbsp. vanilla vodka
  • 2 tbsp. Key Lime juice (or 2 tbsp. fresh lime juice)
  • 2 tbsp. heavy whipping cream

Garnish

  • Lime wedge
  • 1/2 tsp. Graham cracker crumbs (can mix with sugar for a sweeter taste)

Directions

  1. Chill martini glass.
  2. Fill a shaker with ice and combine Licor 43, vanilla vodka and lime juice.
  3. Shake until shaker is icy cold. 
  4. Open shaker, add the heavy cream, and shake again. 
  5. Rub chilled martini glass rim with lime wedge, dip into graham crackers on a place, and strain drink into martini glass.
  6. Garnish with a lime slice (optional). 
  7. Enjoy!

Bisquick Impossible Quiche


I hope everyone is well and staying safe during these trying times. I’ve been home and “sheltering in place” for almost four months now, and as such, cooking up a storm. The plus side to this pandemic is that I’m eating healthier and cleaner, and less processed foods… for the most part.

I love breakfast, and have been making a lot of quiches, mostly with a homemade hash brown crust, but wanted to try something different, and came across this recipe from Betty Crocker. From my understanding, this recipe goes back to the 70’s, and used to be printed on the boxes of Bisquick. This dish was called “impossible” because it magically made its own crust as it baked, thus not needing to make a separate bottom crust before adding the main ingredients, which are bacon, onion, eggs, milk, cheese, and Bisquick mix. When baking in a hot oven, it transforms into an incredible, thick quiche-like pie with a golden surface. Impossible, one would think?!

This recipe can be made suited to your own preferences, but I’m giving you the original one, and noting the changes I made.

Ingredients

  • 12 slices bacon, crisply cooked, crumbled (I used 8 slices)
  • 1 cup shredded Swiss cheese (4 oz) (I used sharp cheddar)
  • 1/3 cup chopped onion
  • 3/4 cup Original Bisquick™ mix
  • 1 1/2 cups milk
  • 3 eggs
  • 1/8 tsp. pepper

Directions

  1. Heat oven to 400°F. Grease 9-inch glass pie plate. Sprinkle bacon, cheese and onion into pie plate.
  2. In medium bowl, beat remaining ingredients until blended; pour into pie plate.
  3. Bake 35 to 40 minutes or until knife inserted in center comes out clean. Let stand 5 minutes before serving.
  4. Enjoy!


Nutrition Information

Perfect Popovers


I posted a popovers recipe in 2010… can’t believe it’s been a decade! This version is slightly modified with cooking temperature, ingredients and method, but yields much better results. You can make them in a traditional popover pan or muffin pan; you can even make mini popovers. I’ll provide some basic guidelines for all three, but as always, ovens vary, so I suggest keeping an eye on them. And remember, do NOT open the oven door at all while they’re cooking.

IMG_1751

Ingredients

  • 4 large eggs, warmed in a cup of hot water for 10 minutes before cracking
  • 1 1/2 cups milk (skim, low-fat, or whole), lukewarm
  • 3/4 teaspoon salt
  • 1 1/2 cups all-purpose flour
  • 3 tbsp. melted butter, plus more for greasing the pan

Directions

  1. Preheat oven to 450 F. Position an oven rack on the bottom shelf, with plenty of room for them to rise.
  2. Grease the pan you’re using thoroughly (I use butter), covering the area between the cups as well as the cups themselves. Make sure the oven is preheated before you begin to make the popover batter.
  3. Using a wire whisk, beat together the eggs, milk, and salt. Whisk the egg and milk until well combined, with no streaks of yolk showing.
  4. Add the flour all at once, and beat with a wire whisk until frothy; there shouldn’t be any large lumps in the batter, but smaller lumps are fine.
  5. Stir in the melted butter, combining quickly.
  6. Pour the batter into the muffin cups, filling them about 2/3 to 3/4 full.
  7. For standard muffin pans, bake the popovers for 20 minutes without opening the oven door. Reduce the heat to 350°F (again without opening the door), and bake for an additional 10 to 15 minutes, until they’re a deep, golden brown. If you’re using a popover pan, increase time by 5 minutes. For mini muffin pans, decrease cooking time by 10 minutes. Reminder: keep the door closed.
  8. If you plan on serving the popovers immediately, remove them from the oven, and stick the tip of a knife into the top of each, to release steam and help prevent sogginess. Slip them out of the pan, and serve.
  9. If you want the popovers to hold their shape longer without deflating and settling quite as much, bake them for an additional 5 minutes (for a total of 40 minutes) IF you can do so without them becoming too dark. This will make them a bit sturdier, and able to hold their “popped” shape a bit longer.

To reheat popovers, preheat your oven to 350-400F and bake them for 5-10 minutes on a cookie sheet.

You can also freeze popovers in an airtight bag or container for up to three months.

Recipe adapted from King Arthur Flour
Nutritional Information
SERVING SIZE: 1 medium (64g)
SERVINGS PER BATCH: 12

Amount Per Serving:

CALORIES: 110
CALORIES FROM FAT: 45
TOTAL FAT: 5g
SATURATED FAT: 2.5g
TRANS FAT: 0g
CHOLESTEROL: 70mg
SODIUM: 135mg
TOTAL CARBOHYDRATE: 12g
DIETARY FIBER: og
SUGARS: 2g
PROTEIN: 5g

* The nutrition information provided for this recipe is determined by the ESHA Genesis R&D software program. Substituting any ingredients may change the posted nutrition information.

Happy 2020!!!


I hope you all are enjoying the holiday season, and have an incredible new year!

I know it’s been YEARS since I’ve posted… so many life changes, priorities, etc. My job moved me from Los Angeles to Dallas, where I took a promotional position with another division of our company. I moved into an apartment for a short term, one of my beloved dogs passed away, I bought a house (with a pool!), spent most of my free time decorating/fixing up my home, had a flood in my home, bad hail damage from a big storm, started doing fluid art, rescued a cat from Costa Rica, had skin cancer, adopted a dog, started an Etsy shop for my art, another one of my dogs passed away suddenly, and I just got a new puppy (Maverick). Whew! There was a lot more that transpired, but that’s the short version of why I haven’t made any new posts. It’s interesting… when I started this blog in 2010 while living in Redondo Beach, my house was a very small beach cottage, and the kitchen was not suitable for all of the cooking/baking I did – it didn’t even have a dishwasher. Nonetheless, I loved it there, but my house now boasts a HUGE kitchen, with an island, which is part of the great room, so an incredible space for culinary adventures… and yet, I haven’t fully utilized it for that purpose. At least, not yet. I will be posting a new popover (yorkshire pudding) recipe I just made last night. If you love popovers, and have had trouble making them to come out light, airy and poofy, which I’ve experienced, that recipe will yield perfect popovers.

In the meantime, here’s a glimpse of my kitchen/great room space in my casa in Dallas.

KitchenBastrop Great Room

And the newest addition to the Smith family ♥

Maverick
Maverick Smith

If you’d like to check out my art: Traces of Color

Happy New Year!!!


Sun-Dried Tomato Pasta Salad


Tri-color Rotini

I hope everyone had a happy and safe Fourth of July celebration with lots of delicious food. 🇺🇸 It’s been a while since I posted a new recipe (I’ve taken a little hiatus in the kitchen), and thought I’d share this one I made yesterday. It can be a nice main or side dish, and is yummy both warm or chilled. I kept this pretty simple which made it quick and easy, but you can add your favorite vegetables, and/or chicken or tofu… lots of possibilities. I used tricolor rotini, but feel to go with whatever pasta you’d like (bowtie, penne, small shells, etc.).

The sun-dried tomatoes are used to make a “pesto”, which I decided to do without the use of a food processor. It was a little more work, but I wanted chunkier bits incorporated into the salad and I think it was perfect.

This serves 3-4, so double the ingredients if needed.

Ingredients

  • 6 oz. (about half a box) of tri-color rotini
  • 1/2 cup sun-dried tomatoes, finely chopped
  • 2 tbsp. Parmesan cheese, grated
  • 2 tsp. balsamic vinegar
  • 1 clove garlic, minced
  • 1/4 cup olive oil
  • 2 oz. goat cheese
  • 6-8 cherry tomatoes, halved or quartered
  • Salt & pepper, to taste
  • Basil, for garnish

Directions

  1. Combine your finely chopped sun-dried tomatoes, cheese, garlic, olive oil and balsamic in a bowl and stir very well.
  2. Cook pasta according to package directions.
  3. Drain pasta and reserve some of the cooking liquid.
  4. Toss the pasta with the tomato pesto, and season with salt & pepper, to taste.
  5. Fold in 1 1/2 oz. goat cheese, until melted and well incorporated, and add the cherry tomatoes.
  6. Crumble the remaining goat cheese and sprinkle on top.
  7. Garnish with fresh basil.

Sun-dried Tomato Rotini


Easy Baked Chicken Wings


Boiled & Baked Chicken Wings

I came across a great recipe for lower-guilt chicken wings back some months ago, and have been making them this way ever since. The fact that these come out crispy, are baked instead of fried, and are super easy to throw together, makes me love ’em even more. I do switch up the sauce at times, using one of my favorites from a wing place back home in Rochester, New York (Country Sweet Chicken and Ribs), and also just regular barbecue sauce and honey. Whether you use the sauce in this recipe, or your favorite, I think you’ll love this cooking method and how great these wings turn out.

Ingredients

  • 2 pounds chicken wings (I used wings & drumettes)
  • 1 cup peach jam
  • 2-3 tbsp. chili paste
  • 1 tbsp. lime juice

Directions

  1. Preheat the oven to 450° and line a baking sheet (with sides) with parchment paper. Set aside.
  2. Trim off any extra fat from the chicken wings.
  3. Bring a large pot of water to a boil, adding 1-2 tablespoons of salt to the water.
  4. Place the chicken wings in the boiling water, and boil for 8-10 minutes, stirring occasionally.
  5. Remove the wings from the water to a wire cooling rack placed over a baking pan. Let the wings dry for a few minutes before patting them dry with paper towels (the drier the chicken wings are before you begin to bake them, the crispier they will become).
  6. Place the chicken wings on the baking sheet in a single layer.
  7. Bake in the preheated oven for 30 minutes. Flip the wings over, and bake an additional 10 minutes.
  8. In a large bowl, stir together the peach jam, chili paste and lime juice. Reserve half of the mixture in a separate bowl to be used as dipping sauce when you serve the wings.
  9. Place the hot chicken wings in the large bowl with the remaining sauce. Stir and toss to coat the wings completely with the sauce.
  10. Transfer the wings to a plate and serve with the reserved dipping sauce, blue cheese or ranch and some celery sticks, if desired.

Top ↑

Buffalo Cheese Dip


I hope everyone had a wonderful holiday season, and Happy 2015!! As I’ve mentioned in some previous posts, I receive a ton of recipes emailed to me on a regular basis from various online sources, and saw one I wanted to try, especially since the big “Game Day” is approaching and I know people are always looking for new dishes to serve up at Super Bowl parties. The great thing about this recipe (by Pillsbury) is there are only five ingredients; well, really four… one is an optional garnish. The one thing I did differently from the original is heating up the dip. I tried it both cold and hot, and in my personal opinion, it’s much better when warmed. You can also add some shredded chicken, if desired.

Ingredients

  • 1 package (8 oz) cream cheese, softened
  • 4-5 oz. crumbled blue cheese
  • 1 cup Yoplait® Greek 100 plain yogurt
  • 3/4 cup Buffalo wing sauce
  • 1/4 cup sliced green onions (optional)

Directions

  1. In large bowl, beat cream cheese and all but 2 tablespoons of the blue cheese with electric mixer on medium speed about 30 seconds or until combined.
  2. Add yogurt and wing sauce; beat 30 seconds longer.
  3. Transfer to serving bowl. Top with 2 tablespoons reserved blue cheese and green onions. Drizzle with additional wing sauce, if desired.
  4. For the heated version, follow steps 1 & 2, transfer to a greased casserole dish, and cook in a preheated 350° oven for approximately 35 minutes or until hot. Stir, then top with the reserved blue cheese and green onions.
  5. Serve with celery sticks, carrot sticks, cauliflower, broccoli, tortilla chips, or chicken strips.

Yields 16 servings

Top ↑

Oh-So-Yummy Spiced Pumpkin Cheesecake


I owe you all some new recipes, but in the meantime, I thought I’d share this AMAZING holiday cheesecake!!

Cooking For Love

You wouldn’t know it by the weather here in Southern California right now, but it IS officially fall, and Halloween and Thanksgiving are right around the corner. And, as much as I adore summer, I have to admit, I’m a big fan of both holidays, especially turkey day because of all of the incredible food! Last year, I was invited to someone’s house for the holiday, and was in charge of bringing a couple of dishes – one being dessert. Since I’m a huge cheesecake lover, I decided to go with a pumpkin cheesecake, and I must tell you, it received rave reviews! That same cheesecake actually won a bake-off contest at work! Need I say more? Rest assured, this recipe will not disappoint, and people will be asking you for it!

Topped with low-fat whipped cream, candied pecan pieces and drizzled caramel.

Ingredients

  • 38 Nabisco Ginger Snaps, finely crushed…

View original post 136 more words

Five Ingredient Chicken with Sweet and Spicy Broccoli


5 Ingredient Chicken and Sweet & Spicy Broccoli

I realize it’s been two whole months since I posted a recipe so am way overdue. I made this delicious meal last month, and it’s super easy to put together. I cooked the chicken on top of the stove, but you can definitely use the grill if that’s your preference.

Ingredients

  • 2 skinless, boneless chicken breasts
  • 3 tbsp. balsamic vinegar
  • 3 tbsp. low-sodium soy sauce
  • 3 tbsp. honey
  • 2 tsp. chile paste (like Sambal Oelek)

Directions

  1. Preheat burner to high.
  2. Using 2 tbsp. olive oil, cook chicken for 4-5 minutes without moving them, then turn over and finish cooking on the other side.
  3. Transfer chicken to a small plate or bowl and set aside.
  4. Combine vinegar, soy sauce, honey and chile paste in small saucepan. Stirring with a whisk, bring to a boil, and continue cooking for four minutes or until reduced to 1/3 cup.
  5. Pour sauce over chicken, as much or little as desired.

Sweet and Spicy Broccoli

Ingredients

  • 12 oz. package of broccoli
  • 2 tbsp. low-sodium soy sauce
  • 2 tbsp. rice vinegar
  • 1 tbsp. dark sesame oil
  • 2 tsp. sugar
  • 1/4 tsp. crushed red pepper

Directions

  1. Cook broccoli using your favorite method. (I prefer to steam)
  2. Combine all ingredients (except broccoli) in a small bowl, stir well and drizzle over broccoli.

Top ↑